Getting Started
This page is a brief synopsis of how ALSE Tracker works. It is not intended to be a complete guide but should get you started in understanding how the program is setup and where to enter information for each purpose the program was designed to handle.

Saving Data
In general, ALSE Tracker keeps track of saving data as you move from one row to another, but there are times when it may not be apparent or could be frustrating. The plus, minus, and checkmark buttons at the top of most tables control additions and deletions of rows in the database, and the checkmark shows changes to data and allows explicitly saving those changes.
As you add new rows or type in new or modified text, the checkmark at the top of each table turns black. Moving to another row (by clicking a different row or pressing the cursor key up or down) will implicitly (automatically) save the changes in the previous row. To save changes without moving to another row, just click the black checkmark and it will turn gray, indicating there are no unsaved changes. To discard the changes without saving, hit the escape key.
One particular place where saving data may lead to a confusing error is when adding new Hand Receipt Holders and assigning new equipment at the same time. The Hand Receipt Holder (and specifically a hand receipt number) must be saved before equipment can be assigned.
If you are entering in a new HR# and HR Holder then immediately trying to add an NSN, the check mark above the hand receipt holder will be black (showing unsaved changes) and when you add equipment the error message "Master Record Missing" will be displayed. Just click the black checkmark above the HR Holder to save those changes first, then add the equipment.

Backup and Restore
The “File” -> “Backup / Restore” menu option will bring up a dialog with all the backup and restore options (all the data in the user interface will disappear as the database is unmounted).
By default the backup location is set to the A:\ drive (because when the application was made all computers had floppy drives for off-device backup).
Just type in a new location or click the browse button (folder icon) and select a new drive and folder. When you click the “Backup” button a “Backup.Alse” file will be created (changing the name to include the date will help keep track of backups).
The backup file is a compressed copy of the entire password protected database. If a backup file is selected and the “Restore” button pressed, the current database will be erased and replaced with the version from the backup.
Some people have used backup files to keep track of gear in multiple units by saving changes to unit-based backup files and switching units by saving current work to one backup file and restoring from a different backup file for another unit.

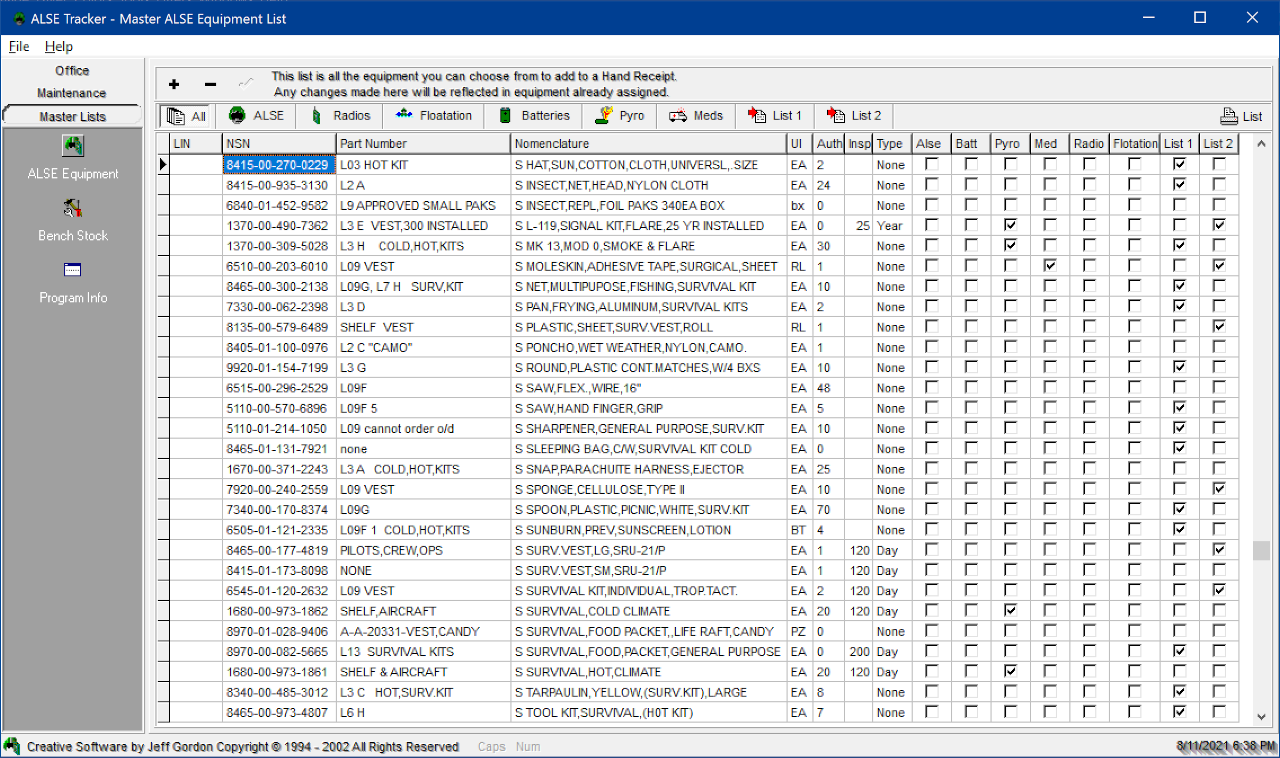
Master Lists
The area with Master Lists is used to define all the gear you want to track, and is preloaded with items recommended by a number of ALSE inspectors. Items can easily be added and categorized so they appear in the other areas of the program to allow tracking accountability and inspections. The information from the ALSE Equipment Master List is also what you see in the drop-down list when you add an item to any of the lists in the Maintenance area of ALSE Tracker.
In addition to checkboxes that allow categorizing ALSE Equipment, the Inspection Type in the Master List is used to determine if gear will show up in the Inspections part of the Maintenance area. This centralized list allows changes of inspection criteria or nomenclature to be made in one place that are then refected across all tracked gear. For example, if an inspection interval changes from 90 to 60 days you only have to update it once in the Master List (the individual assigned due dates will not change until the next inspection is performed).
Two of the checkbox columns are for creating custom lists to make creating a “standard” hand receipt a whole lot easier. Just check the “List 1” or “List 2” items you want as your standard issue, then in the Hand Receipt area of Maintenance section you can use the buttons in the upper right to add all the items from one (or both) of the lists you just specified.
You can also maintain and categorize a list of bench stock items and assign drawer and bin numbers (in the Office area), and the “Program Info” sets program setup options like your name, your company name, and aircraft tail numbers for printed items.
Maintenance
The Maintenance area is where you view all your information. Buttons on the left (except Aircraft Equipment) show the same information entered in a Hand Receipt; just organized different ways.
Hand Receipt
The Hand Receipt area is where items and people are added and deleted. Click on a person’s name on the left, and the grid on the right shows everything assigned to them. When entering new HR Holders be sure to click the black checkmark to save the HR Holder before trying to assign equipment.
Print a Hand Receipt with the print button in the upper right, above the grid, but only the items with an On-Hand quantity of 1 or more will be shown on the printed hand receipt. This allows things like personal helmets to be entered in the program so the Inspections can be tracked, but the items won’t show up on the Hand Receipt. To assign an item to a Hand Receipt, either select from the drop-down list of Master List items, type in an NSN, or add the items from one of two custom lists defined from Master List items.
Inspections
The Inspections button takes the items entered in Hand Receipts (that are Inspectable items i.e. have ‘Day’ or ‘Year’ and not ‘None’ assigned as an Inspection Type) and displays them according to Due Date. Anywhere the “Sorted By…” at the top of the screen is shown, clicking a column heading and the grid will sort by that column. The Inspections area also has a couple different reports. You can list all items due up to a certain date (the drop down list), or all the inspectable items assigned to people (the printed lists will be shown the same as how the grid is sorted). The inspection date can be changed a couple ways; the inspection due date can be changed (either type it or use the drop-down calendar), or the Completed date can be entered and the program will figure out the due date based on the inspection interval. The Completed Date will be erased once the Due Date is set.
View by Type
View by Type is how to categorize gear and print lists of certain items, such as radios. The boxes to the right of the grid can be checked and unchecked to add and remove items from the different categories. This will have no effect on Hand Receipts or Inspections.
Aircraft Equipment
Aircraft Equipment is a separate area used to track fly-away gear. Add aircraft tail numbers and types of gear in the Program Setup area of the Master Lists tab, then add new items to the list in the Aircraft Equipment area.

Office
The Office section holds the Bench Stock and Tech Manuals areas.
The Bench Stock is similar to assigning Hand Receipts except items are added to drawers and bins (defined in the Program Setup of the Master List area).
The Tech Manuals area is a list of all the manuals, changes, and locations that really makes you look good during an inspection. Printing out the list and having it available by your manuals gives you a professional, organized look before a single book is inspected.
Bench Stock
This area allows you to maintain several stock lists. Just as in View by Type, this area has groups for items to select and view or print. The groups are Bench Stock, Class VIII, Operational Load, PLL, and Shop Stock. You can also print out an Inventory Sheet (by Drawer and Bin) to easily reconcile and reorder necessary bench stock. Buttons across the top show the categorized supplies, but always add new items while the All button is depressed to prevent something from seemingly disappearing because it isn’t assigned the category you have selected.
Tech Manuals
This area is pre-populated with some of the ALSE TM’s ready for you to assign locations and quantities. TM changes applied are tracked for each TM and a list may be printed for all TM’s.
